The IRO long list is a single-page table for managing all Impacts, Risks and Opportunities (IROs) within a specific Double Materiality analysis version. It shifts IRO management from a topic-by-topic basis to one comprehensive view, with filtering, sorting, and bulk actions.
The list also surfaces each IRO's Assessment status, so you can see at a glance which IROs still need review and which are already settled within the current version. This is distinct from Review status, which tracks the SME assessment process. See Assigning Subject Matter Experts (SMEs) to Assess IROs for the Review status workflow.
Why this matters
- See all IROs from a version in one scrollable table, rather than navigating topic by topic
- Narrow down IROs by attributes such as Value Stream, Time Horizon, Materiality, and Reviewers
- Track reassessment progress directly from the Assessment status column and the overview counters above the table
- apply bulk actions (such as assigning reviewers or deleting IROs) to multiple IROs at once
Where to find the IRO long list
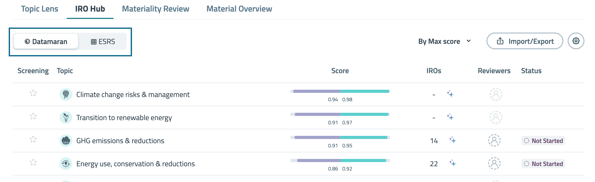
You access the IRO long list from the IRO Hub, using either the Datamaran topics or the ESRS topics.
Step-by-step
- From the main navigation menu, select IRO Hub.
- Select either the Datamaran or the ESRS topic tab.
- Click any Topic Name (for example, Climate Change risk & management or E1: Climate Change) to open the detailed IRO view for that topic.
- The table opens for that topic.
Note: The long list initially shows IROs for the topic you clicked to enter the view; use the top filters to add other topics.
Understanding the overview counters
Above the IRO long list, overview counters show how many IROs fall into each Assessment status. The counts react to your active filters, and you can click a counter to filter the table to that group.
The counters are:
- All IROs — the total IRO count in your inventory
- Not Set — IROs with no Assessment status assigned
- Not required — IROs that do not need assessment in this cycle
- To assess — IROs that need assessment in this cycle
- Complete — IROs that have already been assessed

Using topic and IRO type filters
The total count of IROs shown updates as you apply filters.
-
Select multiple topics:
-
Use the Topics dropdown menu located at the top of the table.
-
Click on the checkbox next to any additional topics (Datamaran or ESRS) you want to include to display their combined IROs.

-
-
Filter by IRO Type:
-
Use the IRO Type dropdown.
-
Select one or more types: Risk, Opportunity, Positive Impact, or Negative Impact. All types are selected by default.
-
Customizing the table view (show or hide columns)
- Click the Column filter button on the top right of the table.
- A menu lists all available data columns (for example, Materiality, Time Horizon, Reviewers, Assessment status, Review status).
- Check or uncheck the boxes next to the column names to show or hide them. All columns are shown by default.
Note: The Assessment status column is visible to Owners and Readers; Reviewers do not see this column. Only Owners can edit it. See Recommended Evaluation Flow for Reassessing IROs for role permissions.
Filtering and sorting IROs within the columns
You can sort and filter directly from each column header.
Sorting data
- Find the column you want to sort (for example, Materiality).
- Click the arrow icon next to the column title to cycle between ascending and descending order.
Using advanced column filters
- Click the filter icon next to the column title (for example, Time Horizon or Assessment status).
- In the pop-up:
- For categorical and numerical columns (for example, Assessment status, Materiality, Score), select the specific values you want to see.
- For text columns (for example, IRO Description), use the search bar to find IROs containing specific keywords.
- Click Apply. The column header indicates an active filter.
Tip: To work through a reassessment cycle, filter Assessment status to To assess. See Recommended Evaluation Flow for Reassessing IROs.